Advertising on Facebook isn’t dead. Despite new players on the social media scene — TikTok, we’re looking at you — knowing how to advertise on Facebook is still an essential skill for most marketers.
Right now, if you advertise on Facebook, your ads can reach 2.17 billion people — in other words, close to 30% of the world’s population. Plus, the platform’s active user base continues to grow.
Sure, these are impressive numbers. But Facebook is all about getting your message in front of the right segment of those people. The users who are most likely to be interested in buying your products or services.
Keep reading to find out everything from how much Facebook ads cost to how to plan your first campaign.
Psst, if you’re here for the simplest way to post a Facebook ad, watch our video on how to boost posts from your Facebook page:
What are Facebook ads?
Facebook ads are paid posts that businesses use to promote their products or services to Facebook users.

Source: Fairfax & Favor on Facebook
Facebook ads are usually targeted to users based on their:
- Demographics
- Location
- Interests
- Other profile information
Businesses set an ad budget and bid for each click or thousand impressions the ad receives.
Like Instagram, Facebook ads appear throughout the app, including in users’ feeds, Stories, Messenger, Marketplace, and more. They look similar to normal posts but always include a “sponsored” label to show they’re an ad. Facebook ads include more features than regular posts, like CTA buttons, links, and product catalogs.
To get your brand in front of more users, ads should be a component of any Facebook marketing strategy.
How much does it cost to advertise on Facebook?
There’s no hard and fast rule when it comes to Facebook ad budgets. The cost of Facebook ads depends on several variable factors, including:
- Audience targeting. It usually costs more to put your ads in front of a narrower audience as opposed to a broader one.
- Ad placement. Costs can change between ads shown on Facebook and Instagram.
- Campaign duration. The number of days and hours a campaign lasts impacts the final cost.
- Competitiveness of your industry. Some industries are more competitive than others for ad space. Ad costs usually increase the higher the product price is or how valuable the lead you’re trying to capture is.
- Time of year. Ad costs can fluctuate during different seasons, holidays, or other industry-specific events.
- Time of day. On average, CPC is lowest between midnight and 6 am in any timezone.
- Location. Average ad costs per country vary widely.
Setting campaign costs according to objectives
Setting the right campaign objective is the most important thing you can do to control Facebook ad costs. Getting this right also increases your chance of success.
Cost-per-click benchmarks vary according to each campaign objective. There are five core campaign objectives to choose from:
- Conversions
- Impressions
- Reach
- Link clicks
- Lead generation
Average cost-per-click varies between different Facebook ad campaign objectives. For example, on average, an impressions campaign objective costs $1.85 per click, while a campaign with a conversions objective costs $0.87 per click.
Choosing the right objective for your campaign is key to reaching goals while lowering costs.
Types of Facebook ads
Marketers can choose between different Facebook ad types and formats to suit their campaign goals, including:
- Image
- Video
- Carousel
- Instant Experience
- Collection
- Lead
- Slideshow
- Stories
- Messenger
The wide range of Facebook ad formats means you can choose the best ad type that matches your business goal. Each ad has a different set of CTAs to guide users to the next steps.
Here are each of Facebook’s ad formats explained in more detail:
Image ads
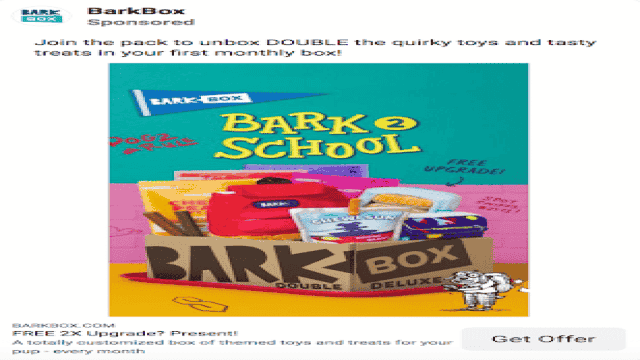
Image ads are Facebook’s most basic ad format. They let businesses use single images to promote their products, services, or brand. Image ads can be used across different ad types, placements, and aspect ratios.
Image ads are a good fit for campaigns with strong visual content that can be shown in just one image. These images could be made from illustrations, design, or photography.
You can create one with just a few clicks by boosting an existing post with an image from your Facebook Page.
Image ads are simple to make and can successfully display your offering if you use high-quality imagery. They’re suitable for any stage of the sales funnel — whether you want to boost brand awareness or promote a new product launch to increase sales.
Image ads can be limiting — you only have a single image to get your message across. If you need to display multiple products or show how your product works, the single image ad format isn’t the best choice.
Source: BarkBox on Facebook
Pro tip: Pay attention to image ad specs and ratios so your product doesn’t get cut off or stretched.
Video ads
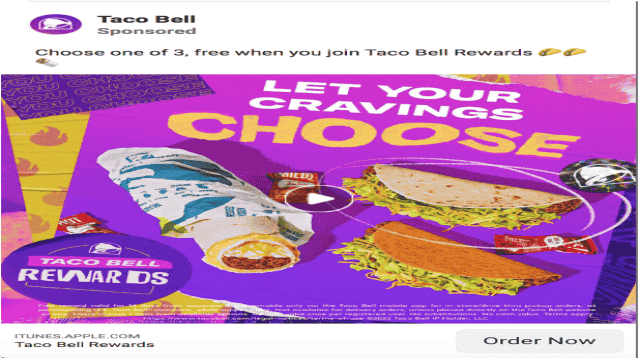
Just like image ads, video ads on Facebook let businesses use a single video to showcase their products, services, or brand.
They’re especially helpful for product demos, tutorials, and showcasing moving elements.
Video can be up to 240 minutes long, but that doesn’t mean you should use that time! Shorter videos are usually more engaging. Facebook recommends sticking to videos under 15 seconds.
Video ads can add some movement to any user’s feed, like this short and sweet video ad from Taco Bell:
Source: Taco Bell on Facebook
The downside of video ads is that they’re time-consuming to make and can become expensive. A carousel or image ad may be a better fit for simple messages or products not requiring demos.
Carousel ads
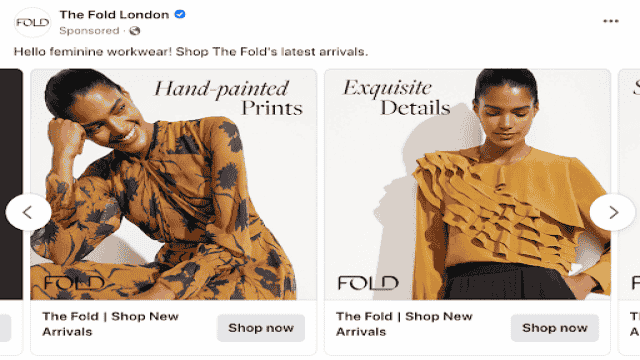
Carousel ads showcase up to ten images or videos that users can click through. Each has its own headline, description, or link.
Carousels are a great choice for displaying a series of different products. Each image in the carousel can even have its own landing page that’s specifically built for that product or service.
This Facebook ad format is also helpful for guiding users through a process or showcasing a series of related products by separating each part across different sections of your carousel.
Source: The Fold London on Facebook
Instant Experience ads
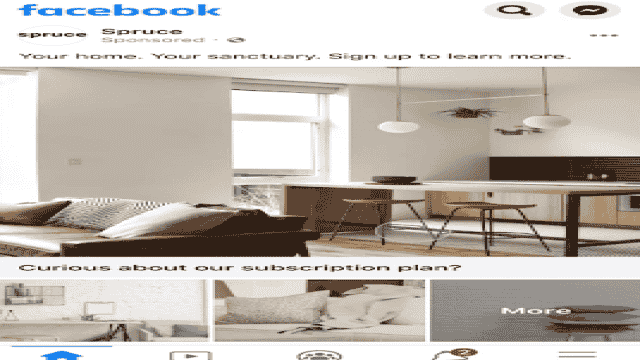
Instant Experience ads, previously known as Canvas Ads, are mobile-only interactive ads that let users engage with your promoted content on Facebook.
Using Instant Experience ads, users can tap through a carousel display of images, shift the screen in different directions, as well as zoom in or out of content.
Facebook suggests using five to seven images and videos in each Instant Experience ad for the best chances of engagement. Premade templates also help you save time and repeat your key theme throughout the ad.
Source: Spruce on Facebook
Collection ads
Collection ads are kind of like immersive carousels — taking the user experience a step up. Collection ads are mobile window-shopping experiences where users can flick through your product lineup. More customizable than Carousels, they’re also full screen. Users can purchase products directly from the Collection ad.
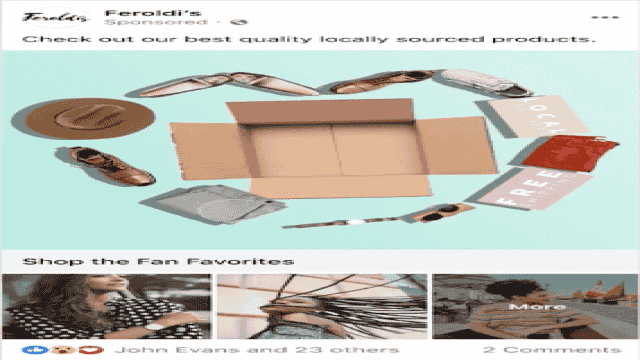
Source: Feroldi’s on Facebook
Businesses can also choose to let Facebook algorithms select which products from your catalog are included for each user.
Collection ads are a great choice for large businesses that sell a variety of products and services. Smaller businesses with a more limited product line may be better suited to other ad types like Carousels.
Lead ads
Lead ads are only available for mobile devices. That’s because they’re specifically designed to make it easy for people to give you their contact information without a lot of typing.
They’re great for collecting newsletter subscriptions, signing someone up for a trial of your product, or allowing people to ask for more information from you. Several automakers have successfully used them to encourage test drives.
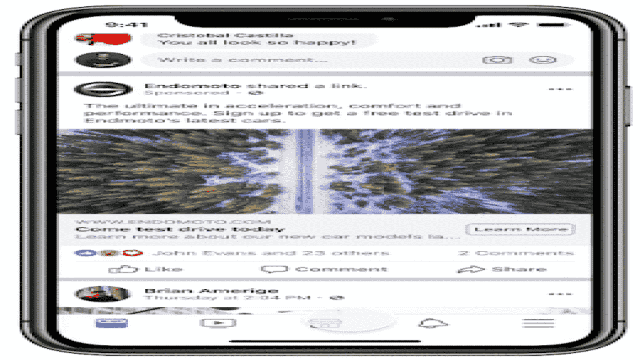
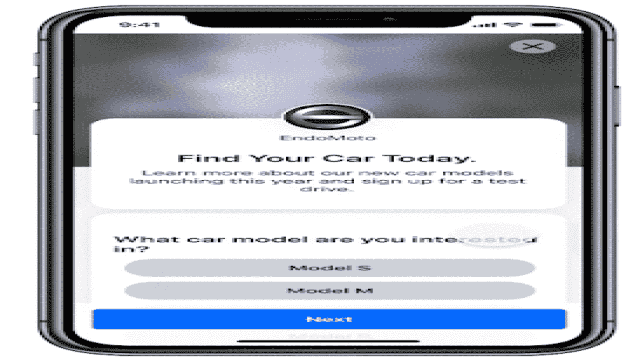
Source: Facebook
Slideshow ads
Slideshow ads are composed of 3-10 images or a single video that plays in a slideshow. These ads are a great alternative to video ads because they use up to five times less data than videos. That makes slideshow ads a top choice for markets where people have slower internet connections.
Slideshow ads are also a great way to get started for people without video-making experience.

Source: Charter College on Facebook
Stories ads
Mobile phones are meant to be held vertically. Stories ads are a mobile-only full-screen vertical video format that allows you to maximize screen real estate without expecting viewers to turn their screens.
Right now, 62% of people in the US say they plan to use Stories even more in the future than they do today.
Stories can be made up of Images, videos, and even carousels.
Here’s an example of a video made into a Story ad:

Source: Waterford on Facebook
Stories provide more creative freedom than regular image or video ads. Businesses can play around with emojis, stickers, filters, video effects, and even augmented reality.
The drawback of Facebook Stories is that they’re not placed in Facebook feeds, so users may not see them as much as other Facebook ad formats.
Facebook Stories also require different formatting than video or image ads, so you may need to create original content just for Stories.
Messenger ads
Messenger ads show up in Facebook’s messenger tab. Since it’s where people spend time chatting with friends and family, Messenger ads feel more personal than scrolling through Image or video ads.
People see your Messenger ads among their conversations and can tap to start a conversation with your brand. These ads are a great way of getting people to interact with your brand. For smaller businesses promoting local products or services, Messenger ads can help start the conversation.
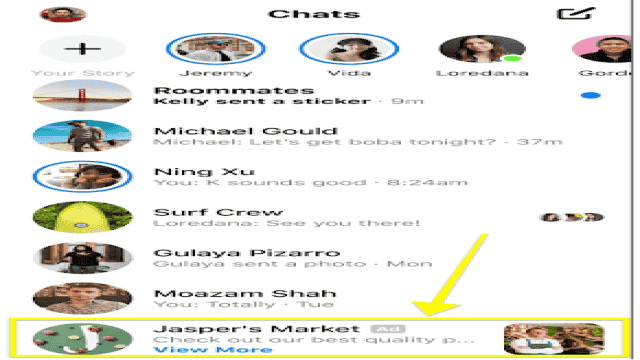
Source: Facebook
How to post ads on Facebook
If you already have a Facebook business page (and you should), you can head straight to the Ads Manager or Business Manager to create your Facebook ad campaign. If you don’t yet have a business page, you’ll need to create one first.
We’ll follow the steps for Ads Manager in this post. If you’d prefer to use Business Manager, you can get the details in our post on how to use Facebook Business Manager.
Ads Manager is the starting place for running ads on Facebook and Messenger. It’s an all-in-one tool suite for creating ads, managing where and when they’ll run, and tracking campaign performance.
Step 1: Choose your objective
Log into Facebook Ads Manager and select the Campaigns tab, then click Create to get started with a new Facebook ad campaign.
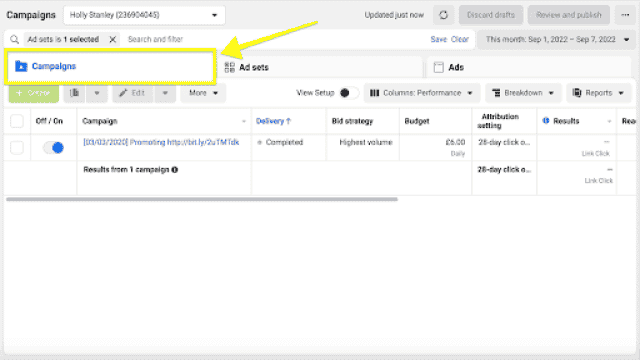
Facebook offers 11 marketing objectives based on what you want your ad to accomplish.
Here’s how they align with business goals:
- Brand awareness: Introduce your brand to a new audience.
- Reach: Expose your ad to as many people in your audience as possible.
- Traffic: Drive traffic to a specific web page, app, or Facebook Messenger conversation.
- Engagement: Reach a wide audience to increase the number of post engagements or Page follows, increase attendance at your event, or encourage people to claim a special offer.
- App installs: Get people to install your app.
- Video views: Get more people to watch your videos.
- Lead generation: Get new prospects into your sales funnel.
- Messages: Encourage people to contact your business using Facebook Messenger.
- Conversions: Get people to take a specific action on your website (like subscribe to your list or buy your product), with your app, or on Facebook Messenger.
- Catalog sales: Connect your Facebook ads to your product catalog to show people ads for the products they are most likely to want to buy.
- Store traffic: Drive nearby customers to brick-and-mortar stores.
Choose a campaign objective based on your goals for this particular ad. Keep in mind that for conversion-oriented objectives (like sales), you can pay per action, but for exposure objectives (like traffic and views), you will pay for impressions.
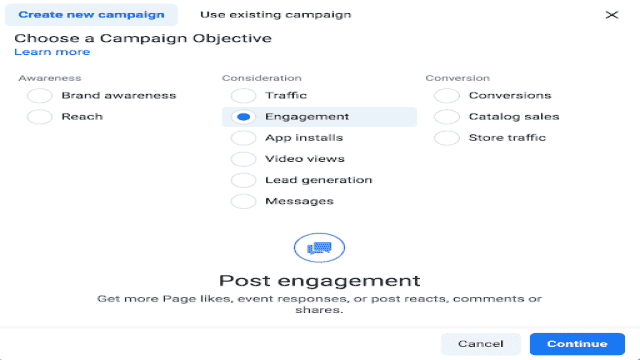
For this example, we’ll choose the Engagement objective. From there, we need to specify which kind of engagement we want.
We’ll choose Page likes for now.
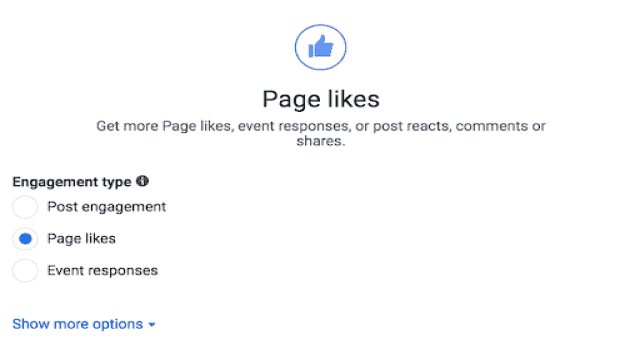
Some of the options you see in the next steps will vary based on which objective you choose.
Click Next.
Step 2. Name your campaign
Name your Facebook ad campaign and declare whether your ad fits into any special categories like credit or politics.
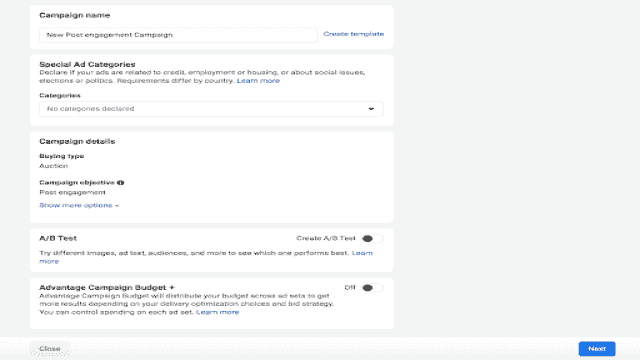
If you want to set up an A/B split test, click Get Started in the A/B Test section to set this ad as your control. You can choose different versions to run against this ad after it’s published.
Scroll down a little further to choose whether to turn on Advantage Campaign Budget+.
This option can be useful if you’re using multiple ad sets, but for now, you can leave it turned off.
Click Next.
Step 3. Set your budget and schedule
At the top of this screen, you will name your ad set and choose which Page to promote.
Next, you decide how much money you want to spend on your Facebook ad campaign. You can choose a daily or lifetime budget. Then, set the start and end dates if you want to schedule your ad in the future or choose to make it live right away.
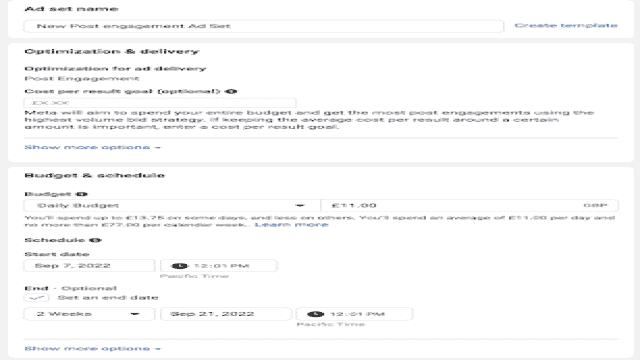
Running your Facebook paid ads on a schedule may be the most efficient way to spend your budget since you can choose only to serve your ad when your target audience is most likely to be on Facebook. You can only set a schedule if you create a lifetime budget for your ad.
Step 4. Target your audience
Scroll down to start building the target audience for your ads.
Start by selecting your target location, age, gender and language. Under location, you can even choose to include or exclude cities over a certain size.
You can also prioritize people who’ve recently shown an interest in the product or service you sell.
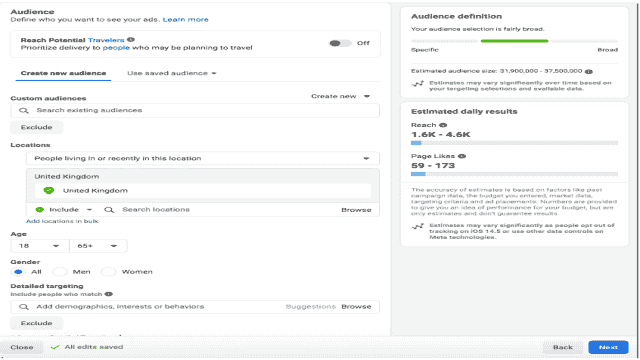
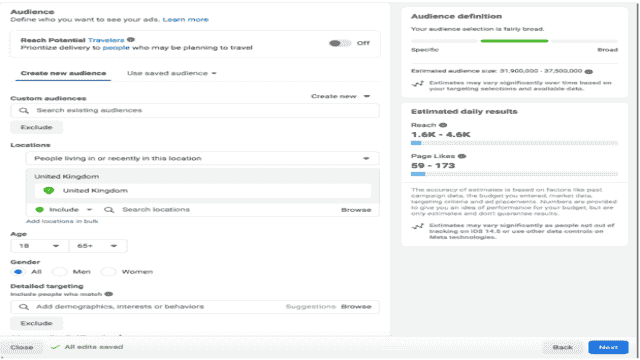
As you make your selections, keep an eye on the audience size indicator on the right of the screen, which gives you a sense of your potential ad reach.
You’ll also see an estimated number of daily reach and Page likes. These estimates will be more accurate if you have run campaigns before since Facebook will have more data to work with. Always keep in mind that these are estimates, not guarantees.
Now it’s time for the detailed targeting.
Remember: Effective targeting is key to maximizing ROI—and there’s no shortage of ways to target your audience using Facebook Ads Manager.
Use the Detailed Targeting field to specifically include or exclude people based on demographics, interests, and behaviors. You can get really specific here. For instance, you could choose to target people who are interested in both traveling and hiking but exclude people who are interested in backpacking.
Step 5. Choose your Facebook ad placements
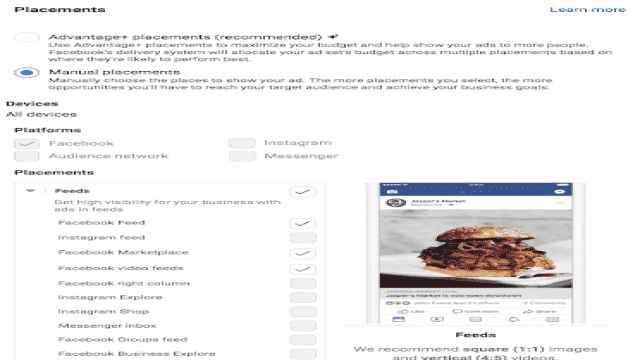
Scroll down to choose where your ads will appear. If you’re new to Facebook advertising, the simplest choice is to use Advantage+ Placements.
When you select this option, Facebook will automatically place your ads across Facebook, Instagram, Messenger, and the Audience Network when they are likely to get the best results.
Once you have more experience, you may wish to select Manual Placements. By choosing this option, you get complete control over where your Facebook ads appear. The more placements you select, the more opportunities you’ll have to reach your target audience.
Your options will vary based on your chosen campaign objective, but may include the following:
- Device type: Mobile, desktop, or both.
- Platform: Facebook, Instagram, Audience Network, and/or Messenger
- Placements: Feeds, Stories, Reels, in-stream (for videos), search, messages, overlay and post-loop ads on Reels, search, in-article, and apps and sites (external to Facebook).
- Specific mobile devices and operating systems: iOS, Android, feature phones, or all devices.
- Only when connected to WiFi: The ad only shows when the user’s device is connected to WiFi.
Step 6. Set brand safety and cost controls
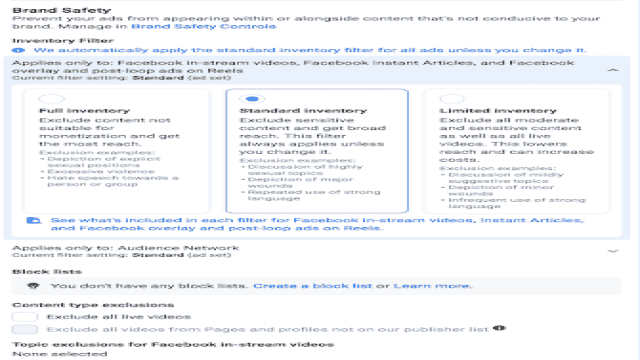
Scroll down to the Brand Safety section to exclude any types of content that would be inappropriate to appear with your ad. (To learn more about brand safety, check out our complete guide to managing risk on social media ad placements.)
For example, you can choose to avoid sensitive content and add specific block lists. Block lists can exclude specific websites, videos, and publishers.
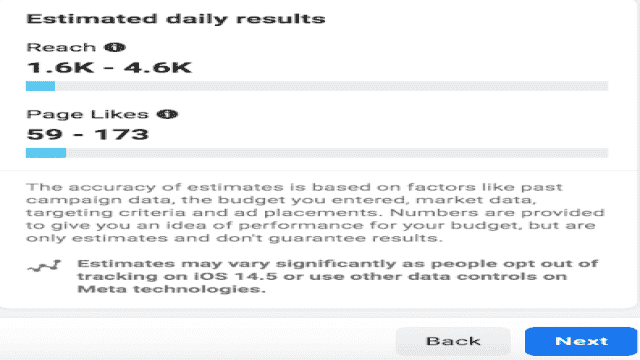
When you’re happy with all your options, take a last look at the potential Reach and Page Likes estimates.
If you’re happy with what you see, click Next.
Step 7. Create your ad
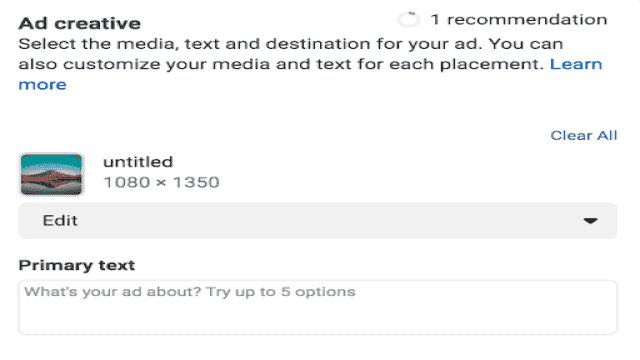
First, choose your ad format, then enter the text and media components for your ad. The formats available will vary based on the campaign objective you selected back at the beginning of this process.
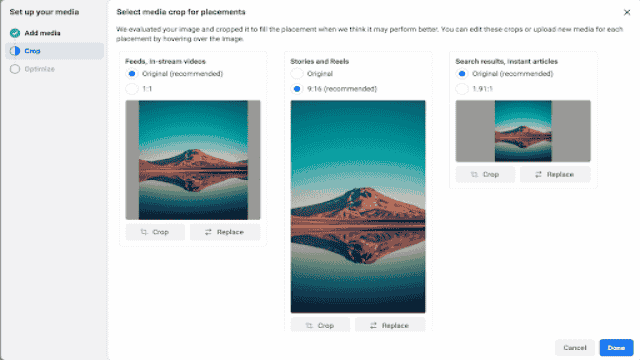
If you’re working with an image, choose your media from your Facebook gallery, and select the right crop to fill your placement.
Use the preview tool at the right of the page to make sure your ad looks good for all potential placements. When you’re happy with your choices, click the green Publish button to launch your ad.
3 tips for posting ads on Facebook
1. Pay attention to Facebook ad specs
Facebook ad sizes change more frequently than the weather (seriously). So that your Facebook ads aren’t stretched, cropped, or distorted in any other way, you’ll need to make sure your selected images and videos fit the right dimensions.
Here’s a quick breakdown:
Facebook video ads
Facebook feed videos
Minimum width: 120 px
Minimum height: 120 px
Resolution: at least 1080 x 1080 px
Video ratio: 4:5
Video file size: 4GB max
Minimum video length: 1 second
Maximum video length: 241 minutes
Facebook also has a full list of all aspect ratios and features for videos.
Facebook instant article videos
Resolution: at least 1080 x 1080 px
Video ratio: 9:16 to 16:9
Video file size: 4GB max
Minimum video length: 1 second
Maximum video length: 240 minutes
Facebook Stories ads
Recommended: Highest resolution available (at least 1080 x 1080 px)
Video ratio: 9:16 (1.91 to 9:16 supported)
Video file size: 4GB max
Maximum video length: 2 minutes
Facebook image ads size
Facebook feed images
Resolution: at least 1080 x 1080 pixels
Minimum width: 600 pixels
Minimum height: 600 pixels
Aspect ratio: 1:91 to 1:1
Facebook Instant Article images
Maximum file size: 30 MB
Aspect ratio: 1.91:1 to 1:1
Resolution: at least 1080 x 1080 px
Facebook Marketplace images
Maximum file size: 30 MB
Aspect ratio: 1:1
Resolution: at least 1080 x 1080 px
2. Test everything
It’s important not to make assumptions about what will work and what won’t in your Facebook ads.
Every time you try something new, you should test it against your previous ads so you can see whether you’re making improvements to the metrics that matter most to you.
The best practices for Facebook ads are constantly changing. Only you know what works for your specific audience. And the only way you can keep that knowledge up to date is by testing.
3. Simplify your workflow
Social media marketers are busy people with seemingly never-ending to-do lists. But there are a couple of ways you can simplify your workflow.
Hootsuite Boost lets you promote social media posts directly from your Hootsuite dashboard. Manage audience targeting, campaign spend, and duration. By setting up Automation Triggers, you can let Hootsuite manage which posts to boost when according to your criteria.
Hootsuite Social Advertising helps you streamline your social marketing workflows and maximize your ad spend. You can boost your most popular organic posts to reach more people. Create ad campaigns, track performance, and make adjustments to improve results. Later, generate rich analytics reports to see which campaigns met your goals.
![guide-facebook-ads-23 How To Advertise on Facebook in 2023 [Complete Guide]](https://frtips.com/wp-content/uploads/2023/11/guide-facebook-ads-23.png)
Get the most out of your Facebook advertising budget with Hootsuite. Easily create, manage, and optimize all your Facebook ad campaigns in one place. Try it free today.
Get Started
With files from Christina Newberry.

![How To Advertise on Facebook in 2023 [Complete Guide]](https://frtips.com/wp-content/uploads/2023/11/guide-facebook-ads.png)